spine-ios Runtime Documentation
Licensing
Please see the Spine Runtimes License before integrating the Spine Runtimes into your applications.
Getting Started
The spine-ios runtime is implemented using an idiomatic Swift thin wrapper around spine-c. It provides SwiftUI views on iOS and macOS, UIKit integration on iOS, and AppKit integration on macOS. Swift and Objective-C are supported.
Rendering uses Metal on all supported UI platforms. The runtime supports all Spine features including physics, except tint black.
Installation
The SpineiOS Metal renderer supports iOS 13.0, tvOS 13.0, macOS 10.15, macCatalyst 13.0, and visionOS 1.0 or newer. The platform-independent SpineC and SpineSwift products additionally support watchOS 6.0 or newer. Install the products you need using the Swift Package Manager.
Ensure that the major.minor version of the spine-runtimes repo branch matches the major.minor Spine Editor version you are exporting from. See Spine Versioning for more information.
Swift Package Manager
Add the spine-ios SPM package to your project:
Via Xcode
- Open your project in Xcode
- Go to File → Add Package Dependencies
- Enter the repository URL:
https://github.com/esotericsoftware/spine-runtimes.git - Choose the version (e.g., branch "4.3")
- Select the libraries you need:
SpineC- C API for low-level accessSpineSwift- Swift API for Swift projectsSpineiOS- iOS/tvOS/macOS rendering and SwiftUI integration with Metal
Via Package.swift
.package(url: "https://github.com/esotericsoftware/spine-runtimes.git", branch: "4.3")
],
targets: [
.target(
name: "YourTarget",
dependencies: [
.product(name: "SpineiOS", package: "spine-runtimes"),
// Or use SpineSwift for cross-platform Swift-only code:
// .product(name: "SpineSwift", package: "spine-runtimes"),
]
)
]
Usage
You can now import the appropriate module in your Swift file:
// or
import SpineSwift // Platform-independent Swift runtime APIs
Samples
The spine-ios runtime includes several samples that showcase its feature set.
You can run the example project following these steps:
- Install Xcode on your mac
- Clone the spine-runtimes repository:
git clone https://github.com/esotericsoftware/spine-runtimes - Open
spine-runtimes/spine-ios/Example/Spine iOS Example.xcodeprojwith Xcode - Select an iOS device/simulator or the
My Macdestination - Press Run (⌘R) to build and run the examples
The SwiftUI examples run on both iOS and macOS and support Xcode previews. The macOS example target requires macOS 12.0 or newer. The Objective-C/UIKit example is available on iOS only.
The example project contains the following examples:
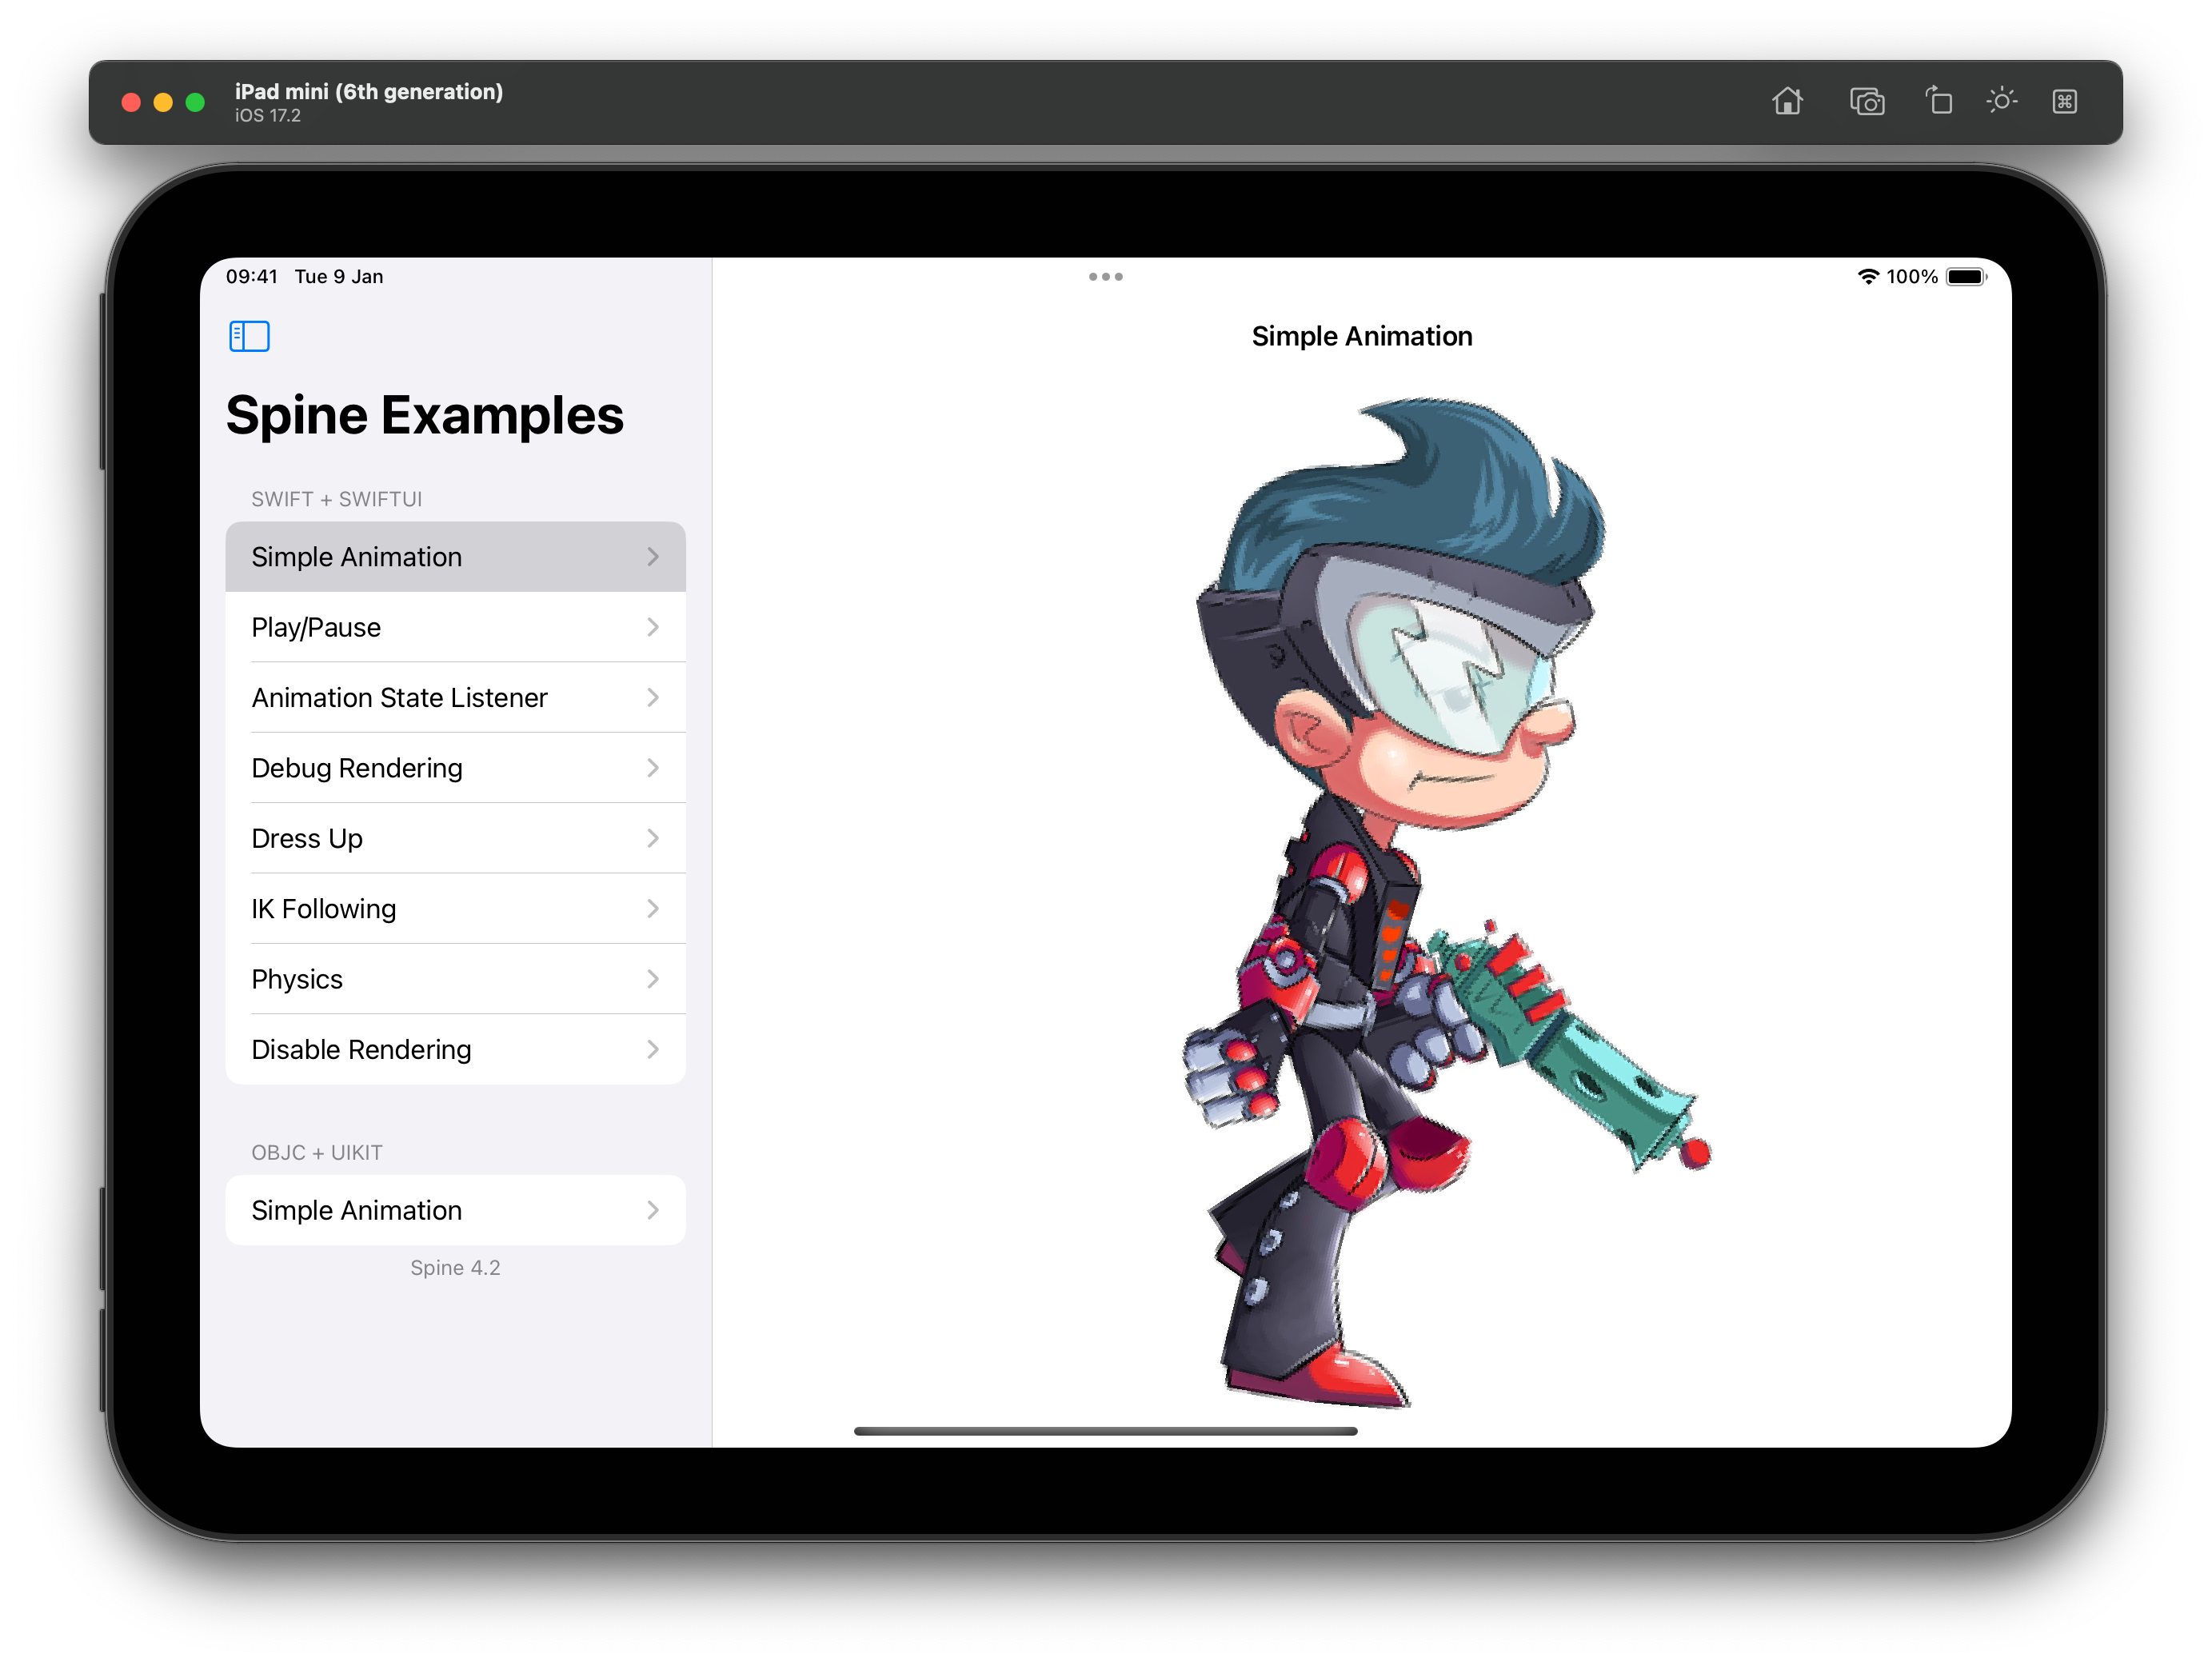
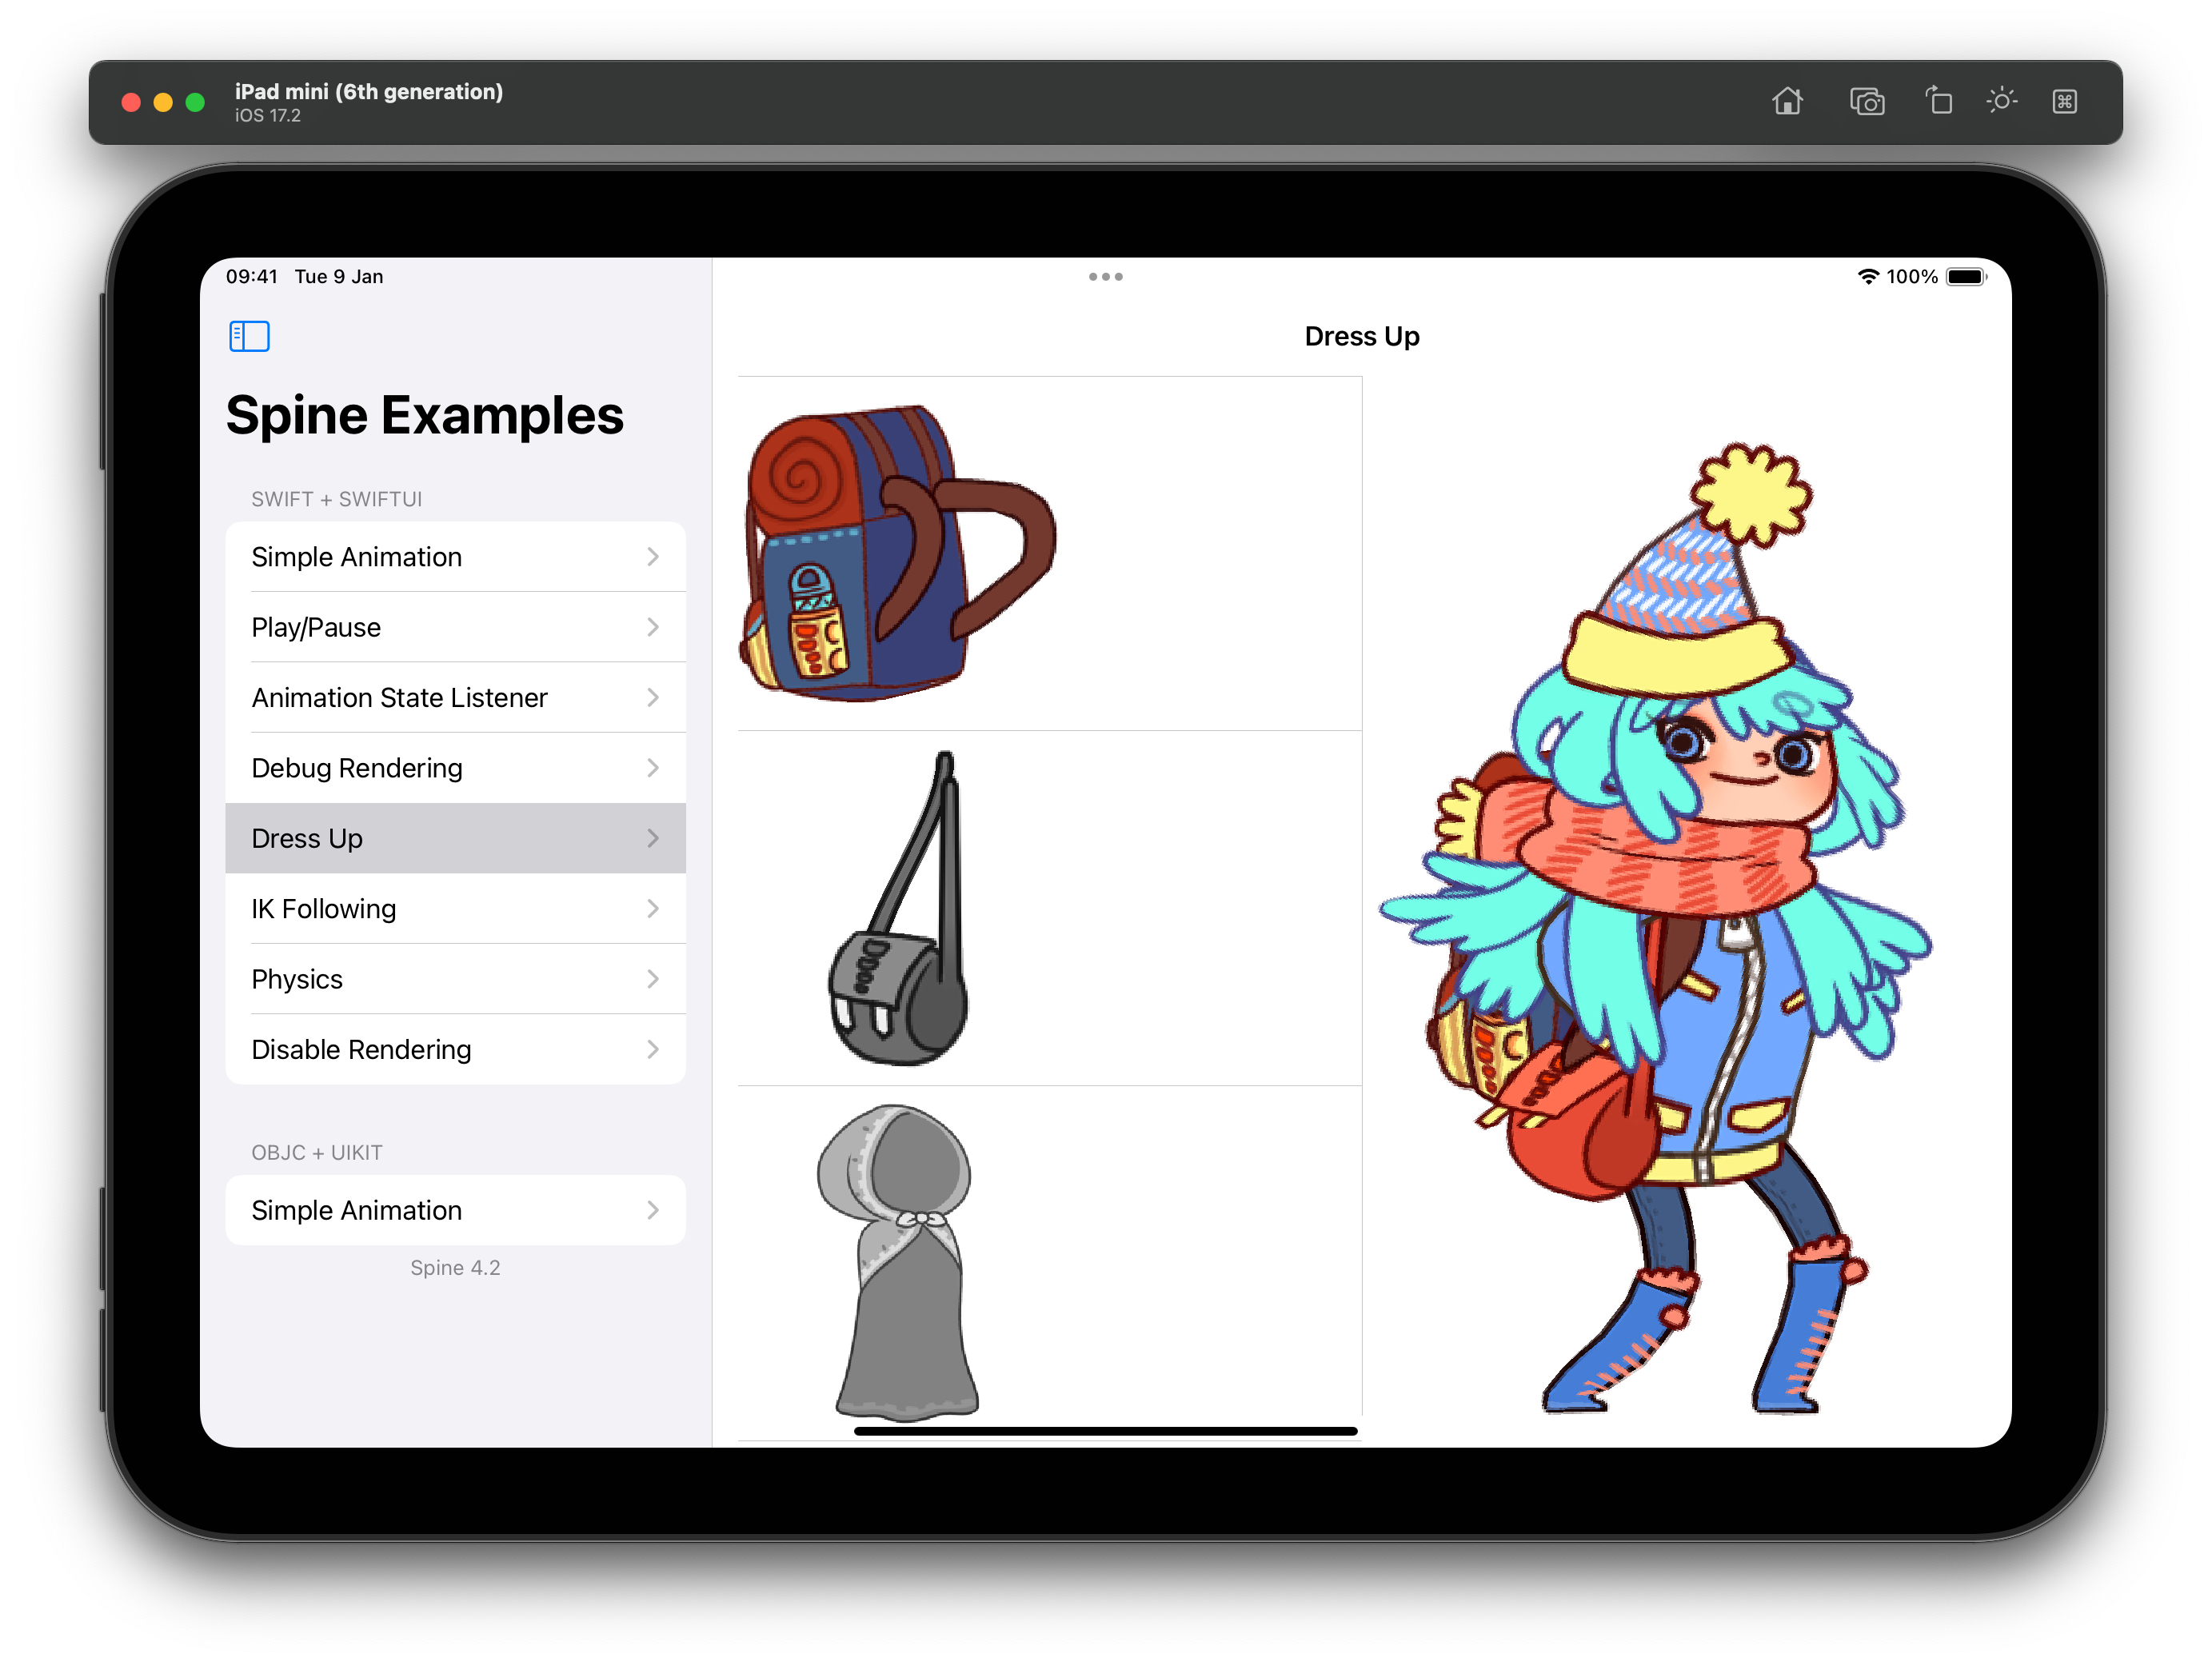
SimpleAnimation.swift: demonstrates the basic use ofSpineViewandSpineControllerto load an exported Spine skeleton, display it in the view, and playback a specific animation.PlayPauseAnimation.swift: demonstrates how to pause and resume an animation.TextureFiltering.swift: demonstrates atlas-defined texture filtering and the nearest-neighbor and linear per-view overrides.AnimationStateEvents.swift: demonstrates how to set a slot's color, how to queue multiple animations, and how to listen for animation state events.DebugRendering.swift: shows how to perform custom drawing on top of the rendered skeleton via theSpineControlleronAfterPaintcallback.DressUp.swift: demonstrates Spine's skins feature as well as rendering a skeleton to a thumbnail for use in a character creation UI.IKFollowing.swift: demonstrates how to let the user drag one of the skeleton's bones via touch input.Physics.swift: demonstrates physics constraints in action with interactive physics simulation.DisableRendering.swift: demonstrates how to disable rendering when theSpineViewmoves off screen. This is important if you need to preserve CPU/GPU resources.SimpleAnimationViewController.m: demonstrates how to use spine-ios with UIKit and Objective-C.
Updating the spine-ios Runtime
Before updating your project's spine-ios runtime, please consult our guide on Spine editor and runtime version management.
For Swift Package Manager, choose the correct commit hash or branch from the correct major.minor branch.
Note: If you change the
major.minorversion of spine-ios, you have to re-export your Spine skeletons with the same Spine Editormajor.minorversion!
Using spine-ios
The spine-ios runtime is an idiomatic wrapper around the generic spine-c runtime which supports loading, playback and manipulation of animations created with Spine. The spine-ios runtime exposes almost all of the spine-cpp API as idiomatic Swift and provides SwiftUI, UIKit, and AppKit integration to display and interact with Spine skeletons.
The spine-ios runtime supports all Spine features including physics, except tint black.
Asset Management
Exporting for spine-ios
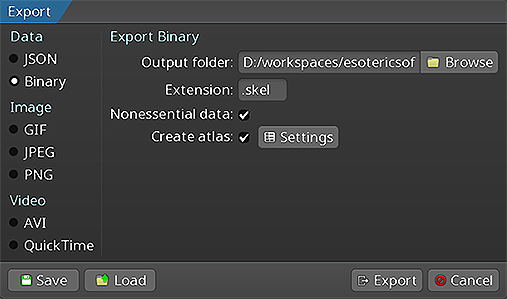 Please follow the instructions in the Spine User Guide on how to
An export of the skeleton data and texture atlas of your skeleton will yield the following files:
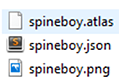
skeleton-name.jsonorskeleton-name.skel, containing your skeleton and animation data.skeleton-name.atlas, containing information about the texture atlas.- One or more
.pngfiles, each representing one page of your texture atlas containing the packed images your skeleton uses.
Note: You should prefer binary skeleton exports over JSON exports, as they are smaller in size and faster to load.
The files can be loaded via spine-ios classes like Atlas, SkeletonData, SkeletonDrawable, and SpineView.
Note: If you are using non-premultiplied assets, you need to disable
Compress PNG FilesandRemove Text Metadata From PNG Filesin your application target's build settings. Alternatively, you can select the.pngfile in Xcode, then set its type toOther - Data, which will prevent any kind of preprocessing.
Updating Spine Assets
During development, you may frequently update your Spine skeleton data and texture atlas files. You can simply overwrite these source files (.json, .skel, .atlas, .png) by re-exporting from the Spine Editor and replacing the existing files in your Xcode project.
Ensure that the major.minor version of spine-ios matches the major.minor Spine Editor version you are exporting from. See Spine Versioning for more information.
Core classes
The spine-ios API is built on top of the generic spine-c runtime, which provides platform independent core classes and algorithms to load, query, modify, and animate Spine skeletons. The core classes are exposed as idiomatic Swift classes through the SpineSwift module.
Here, we will briefly discuss the most important core classes that you will encounter in your day-to-day use of spine-ios. Please consult the Spine Runtimes Guide for a detailed overview of the Spine Runtimes architecture, core classes, and API usage.
The Atlas class stores the data loaded from an .atlas file and its corresponding .png image files.
The SkeletonData class stores the data loaded from a .json or .skel skeleton file. The skeleton data contains information about the bone hierarchy, slots, attachments, constraints, skins, and animations. A SkeletonData instance is usually loaded by also providing an Atlas from which it sources the images to be used by the skeleton it represents. It serves as a blueprint for creating Skeleton instances. Multiple skeletons can be instantiated from the same atlas and skeleton data, which then share the loaded data, minimizing both load times and memory consumption at runtime.
The Skeleton class stores an instance of a skeleton, created from a SkeletonData instance. A skeleton stores its current pose, that is the position of bones and the current configuration of slots, attachments, and active skin. The current pose can be computed by either manually modifying the bone hierarchy, or, more commonly, by applying animations via an AnimationState.
The AnimationState class is responsible for keeping track of which animation(s) should be applied to a skeleton, advancing and mixing those animations based on the elapsed time between the last and current rendering frame, and applying the animations to a skeleton instance, thereby setting its current pose. The AnimationState queries an AnimationStateData instance to retrieve mixing times between animations, or fetches the default mix time if no mixing time is available for a pair of animations.
The spine-ios runtime builds on top of these core classes with Metal rendering and Apple-platform UI integration.
SpineView / SpineUIView
The SpineView struct wraps SpineUIView for SwiftUI. It conforms to UIViewRepresentable on UIKit platforms and NSViewRepresentable on macOS. SpineUIView is a subclass of MTKView, which is backed by UIView on UIKit platforms and NSView on macOS. The SpineUIView name is retained on macOS so the same rendering API can be shared across platforms.
Going forward, we will use SpineView when referring to either one of them.
The SpineView UIKit implementation and SpineView AppKit implementation are responsible for loading and displaying a Spine skeleton. At a minimum, the view needs to know from where to load the skeleton and atlas files, and it can receive a SpineController instance that is responsible for modifying the state of the skeleton, such as setting an animation or changing the skin.
The SpineController is an ObservableObject and should be held inside a @StateObject variable. In the simplest case, a SpineView can be instantiated inside another view's body like this:
var controller = SpineController(
onInitialized: { controller in
controller.animationState.setAnimation(0, "walk", true)
}
)
var body: some View {
SpineView(
from: .bundle(atlasFileName: "spineboy.atlas", skeletonFileName: "spineboy-pro.skel"),
controller: controller,
mode: .fit,
alignment: .center
)
}
This SwiftUI code is identical on iOS and macOS. In UIKit or AppKit code, instantiate SpineUIView directly and add it to the native view hierarchy. On macOS, SpineUIView is an NSView through its MTKView superclass.
Public platform type aliases keep loading and rendering APIs consistent:
SpineUIImageisUIImageon UIKit platforms andNSImageon macOS.SpineUIColorisUIColoron UIKit platforms andNSColoron macOS.SpineUIScreenisUIScreenon UIKit platforms andNSScreenon macOS.
For example, atlas loading returns [SpineUIImage], and backgroundColor parameters accept SpineUIColor. Existing UIKit code can continue passing UIImage and UIColor because these names are type aliases.
A native AppKit view controller can host SpineUIView directly:
import SpineiOS
final class SpineViewController: NSViewController {
private let controller = SpineController(
onInitialized: { controller in
controller.animationState.setAnimation(0, "walk", true)
}
)
private var spineView: SpineUIView!
override func viewDidLoad() {
super.viewDidLoad()
spineView = SpineUIView(
atlasFileName: "spineboy.atlas",
skeletonFileName: "spineboy-pro.skel",
controller: controller
)
spineView.frame = view.bounds
spineView.autoresizingMask = [.width, .height]
view.addSubview(spineView)
}
}
Upon instantiation, the SpineView will asynchronously load the specified files and construct the underlying core class instances from them, namely instances of Atlas, SkeletonData, Skeleton, AnimationStateData, and AnimationState.
Once loading is complete, the SpineController onInitialized callback is called, allowing it to modify the state of the skeleton, such as setting one or more animations, manipulating the bone hierarchy, or modifying the skin. See the section on SpineController below.
The SpineView class takes the SpineViewSource enum as its first parameter, to load skeleton and atlas files from different sources:
SpineViewSource.bundleloads files from the main bundle, or a provided bundle.SpineViewSource.fileloads files from the file system.SpineViewSource.httploads files from URLs.SpineViewSource.drawable()constructs a view from aSkeletonDrawable. This is useful when the skeleton data should be preloaded, cached, and/or shared betweenSpineViewinstances. See the section "Pre-loading and sharing skeleton data" below.
Additionally, SpineView has optional arguments that let you further define how the Spine skeleton is fitted and aligned inside the view:
mode, how the skeleton is fitted insideSpineUIView. By default, it is.fitalignment, how the skeleton is aligned insideSpineUIView. By default, it is.centerboundsProvider, used to calculate the pixel size of the bounding box to be used for the skeleton when computing the fit and alignment. By default, the skeleton's setup pose bounding box is used. See the class documentation forSetupPoseBounds,RawBounds, andSkinAndAnimationBoundsfor additional information.backgroundColor: The background color of the view. By default,SpineUIColor.clearis used (UIColor.clearon UIKit andNSColor.clearon AppKit)textureFilter: The texture filtering mode. By default,.atlasis used.
With .atlas, SpineView honors the minification, magnification, mipmap, and wrap settings exported for each atlas page. Use .nearest or .linear to override filtering for every page in the view. The overrides disable mipmapping but continue to use each page's wrap settings:
SpineView(from: source, textureFilter: .nearest) // Nearest-neighbor override
SpineView(from: source, textureFilter: .linear) // Linear override
Texture filtering is selected when the renderer is created. Recreate the view to change it at runtime. See TextureFiltering.swift for an interactive example.
The SpineView has an additional optional binding parameter isRendering, through which rendering can be disabled. See the DisableRendering.swift example for more information.
SpineController
A SpineController controls how the skeleton of a SpineView is animated and rendered. The controller is provided with a set of optional callbacks as constructor arguments, which are called at specific times during the lifetime of the SpineView.
The controller exposes the skeleton state through properties returning Spine Runtimes API objects such as the Atlas, SkeletonData, Skeleton, and AnimationState, through which the state can be manipulated. See the Spine Runtimes Guide, and the class documentation for more information.
Upon initialization of a SpineView, the controller's onInitialized() callback method is invoked once. This method can be used to setup the initial animation(s) to be played back, or set the skin of the skeleton, among other things.
After initialization is complete, the SpineView is rendered continuously at the screen refresh rate. Each frame, the AnimationState is updated based on the currently queued animations, and applied to the Skeleton.
Next, the optional onBeforeUpdateWorldTransforms() callback is invoked, which can modify the skeleton before its current pose is calculated using Skeleton.updateWorldTransform().
After the current pose has been calculated, the optional onAfterUpdateWorldTransforms() callback is invoked, which can further modify the current pose before the skeleton is rendered. This is a good place to manually position bones.
Before the skeleton is rendered by the SpineView, the optional onBeforePaint() callback is invoked, which allows rendering backgrounds or other objects that should go behind the skeleton.
After the SpineView has rendered the current skeleton pose, the optional onAfterPaint() callback is invoked, which allows rendering additional objects on top of the skeleton.
By default, the view updates and renders the skeleton every frame. The SpineController.pause() method can be used to pause updating and rendering the skeleton. The SpineController.resume() method resumes updating and rendering the skeleton. The SpineController.isPlaying property reports the current playback state. See the PlayPauseAnimation.swift example.
SkeletonDrawableWrapper / SkeletonDrawable
A SkeletonDrawableWrapper holds SkeletonDrawable and bundles loading, storing, updating, and rendering a Skeleton and its associated AnimationState into a single, easy to use class. The SpineView encapsulates the state of the skeleton it displays via an instance of a SkeletonDrawableWrapper.
Use the fromBundle(), fromFile(), or fromHttp() methods to construct a SkeletonDrawableWrapper from file assets. To share Atlas and SkeletonData among multiple SkeletonDrawableWrapper instances, instantiate the drawables via the constructor, passing the same atlas and skeleton data to each of them.
The SkeletonDrawableWrapper exposes the SkeletonDrawable, Skeleton, AnimationState and AnimationStateEventManager to query, modify, and animate the skeleton. It also exposes the Atlas and SkeletonData from which the skeleton and animation state have been constructed.
To animate the skeleton, queue animations on one or more tracks via the AnimationState API, such as AnimationState.setAnimation() or AnimationState.addAnimation().
To update the animation state, apply it to the skeleton, and update the current skeleton pose, call the SkeletonDrawableWrapper.update() method, providing it a delta time in seconds to advance the animations.
To render the current pose of the Skeleton as a CGImage, use SkeletonDrawableWrapper.renderToImage(size:boundsProvider:backgroundColor:scaleFactor:). scaleFactor controls the output resolution: a 200×200 point image rendered with a scale factor of 2 produces a 400×400 pixel CGImage. Use UIScreen.main.scale on iOS or NSScreen.main?.backingScaleFactor ?? 1 on macOS when the image will be displayed in the UI. See DressUp.swift for a cross-platform example.
The SkeletonDrawable stores objects allocated on the native heap. The native objects need to be manually disposed of via a call to SkeletonDrawable.dispose() if the SkeletonDrawable is no longer needed. Not doing so will result in a native memory leak.
Note:
SpineControllerdoes this automatically when being deinitialized. However, if you hold theSkeletonDrawableWrapperoutside ofSpineController, you are responsible for disposing as described above. In this case, set the optionaldisposeDrawableOnDeInitconstructor parameter ofSpineControllertofalse.
Applying Animations
Applying animations to a skeleton displayed by a SpineView is done through the AnimationState in the callbacks of a SpineController.
Note: See Applying Animations in the Spine Runtimes Guide for more in-depth information, specifically about animation tracks and animation queueing.
To set a specific animation on track 0, call AnimationState.setAnimation():
var controller = SpineController(
onInitialized: { controller in
// Set the walk animation on track 0, let it loop
controller.animationState.setAnimation(0, "walk", true)
}
)
The first parameter specifies the track, the second parameter is the name of the animation, and the third parameter defines whether to loop the animation.
You can queue multiple animations:
controller.animationState.addAnimation(0, "jump", false, 2)
controller.animationState.addAnimation(0, "run", true, 0)
The first parameter to addAnimation() is the track. The second parameter is the name of the animation. The third parameter specifies whether to loop the animation. The final parameter defines the delay in seconds, after which this animation should replace the previous animation on the track.
In the example above, the "walk" animation is played back first. 2 seconds later, the "jump" animation is played back once, followed by a transition to the "run" animation, which will be looped.
When transitioning from one animation to another, AnimationState will mix the animations for a specifiable duration. These mix times are defined in an AnimationStateData instance, from which the AnimationState retrieves mix times.
The AnimationStateData instance is also available through the controller. You can set the default mix time, or the mix time for a specific pair of animations:
controller.animationStateData.setMix("walk", "jump", 0.1)
When setting or adding an animation, a TrackEntry object is returned, which allows further modification of that animation's playback. For example, you can set the track entry to reverse the animation playback:
entry.reverse = true
See the TrackEntry class documentation for more options.
Note: Do not hold on to
TrackEntryinstances outside the function you are using them in. Track entries are re-used internally and will thus become invalid once the animation it represents has been completed.
You can set or queue empty animations on an animation track to smoothly reset the skeleton back to its setup pose:
controller.animationState.addEmptyAnimation(0, 0.5, 0.5)
The first parameter to setEmptyAnimation() specifies the track. The second parameter specifies the mix duration in seconds used to mix out the previous animation and mix in the "empty" animation.
The first parameter to addEmptyAnimation() specifies the track. The second parameter specifies the mix duration. The third parameter is the delay in seconds, after which the empty animation should replace the previous animation on the track via mixing.
All animations on a track can be cleared immediately via AnimationState.clearTrack(). To clear all tracks at once, AnimationState.clearTracks() can be used. This will leave the skeleton in the last pose it was in.
To reset the pose of a skeleton to the setup pose, use Skeleton.setupPose():
This will reset both the bones and slots to their setup pose configuration. Use Skeleton.setupPoseSlots() to only reset the slots to their setup pose configuration.
AnimationState Events
An AnimationState emits events during the life-cycle of an animation that is being played back. You can listen for these events to react as needed. The Spine Runtimes API defines the following EventType types:
EventType.start: emitted when an animation is started.EventType.interrupt: emitted when an animation's track was cleared, or a new animation was set.EventType.complete: emitted when an animation completes a loop.EventType.end: emitted when an animation will never be applied again.EventType.dispose: emitted when the animation's track entry is disposed.EventType.event: emitted when a user defined event happened.
To receive events, you can register an event listener callback with the AnimationState to receive events across all animations, or with a specific TrackEntry for events from that animation:
walkEntry.setListener { type, entry, event in
if type == .event, let event = event {
print("User defined event: \(event.data.name)")
}
}
controller.animationState.setListener { type, entry, event in
print("Animation state event \(type)")
}
See the AnimationStateEvents.swift example.
Skins
Many applications and games allow users to create custom avatars out of many individual items, such as hair, eyes, pants, or accessories like earrings or bags. With Spine, this can be achieved by mixing and matching skins.
You can create custom skins from other skins like this:
let skeleton = controller.skeleton
let customSkin = Skin.create("custom-skin")
customSkin.addSkin(data.findSkin("skin-base")!)
customSkin.addSkin(data.findSkin("nose/short")!)
customSkin.addSkin(data.findSkin("eyelids/girly")!)
customSkin.addSkin(data.findSkin("eyes/violet")!)
customSkin.addSkin(data.findSkin("hair/brown")!)
customSkin.addSkin(data.findSkin("clothes/hoodie-orange")!)
customSkin.addSkin(data.findSkin("legs/pants-jeans")!)
customSkin.addSkin(data.findSkin("accessories/bag")!)
customSkin.addSkin(data.findSkin("accessories/hat-red-yellow")!)
skeleton.setSkin2(customSkin)
skeleton.setupPose()
Create a custom skin with the Skin.create() static function.
Next, fetch the SkeletonData from the controller. It is used to look up skins by name via SkeletonData.findSkin().
Add all the skins you want to combine into the new custom skin via Skin.addSkin().
Finally, set the new skin on the Skeleton and call Skeleton.setupPoseSlots() to ensure no attachments from previous skins and/or animations are left over.
Note: A
Skinwraps an underlying C++ object. It needs to be manually disposed via a call toSkin.dispose()when it is no longer in use.
See the DressUp.swift example, which also demonstrates how to render thumbnail previews of skins using SkeletonDrawableWrapper.
Physics

spine-ios fully supports physics constraints, allowing for dynamic, realistic animations that respond to movement and forces. Physics can be controlled through the Physics enum when updating world transforms:
skeleton.updateWorldTransform(.update)
// Reset physics state
skeleton.updateWorldTransform(.reset)
// Pose without physics
skeleton.updateWorldTransform(.pose)
The physics system supports various constraint types including mass, damping, gravity, and inertia. See the Physics.swift example for an interactive demonstration.
Setting Bone Transforms
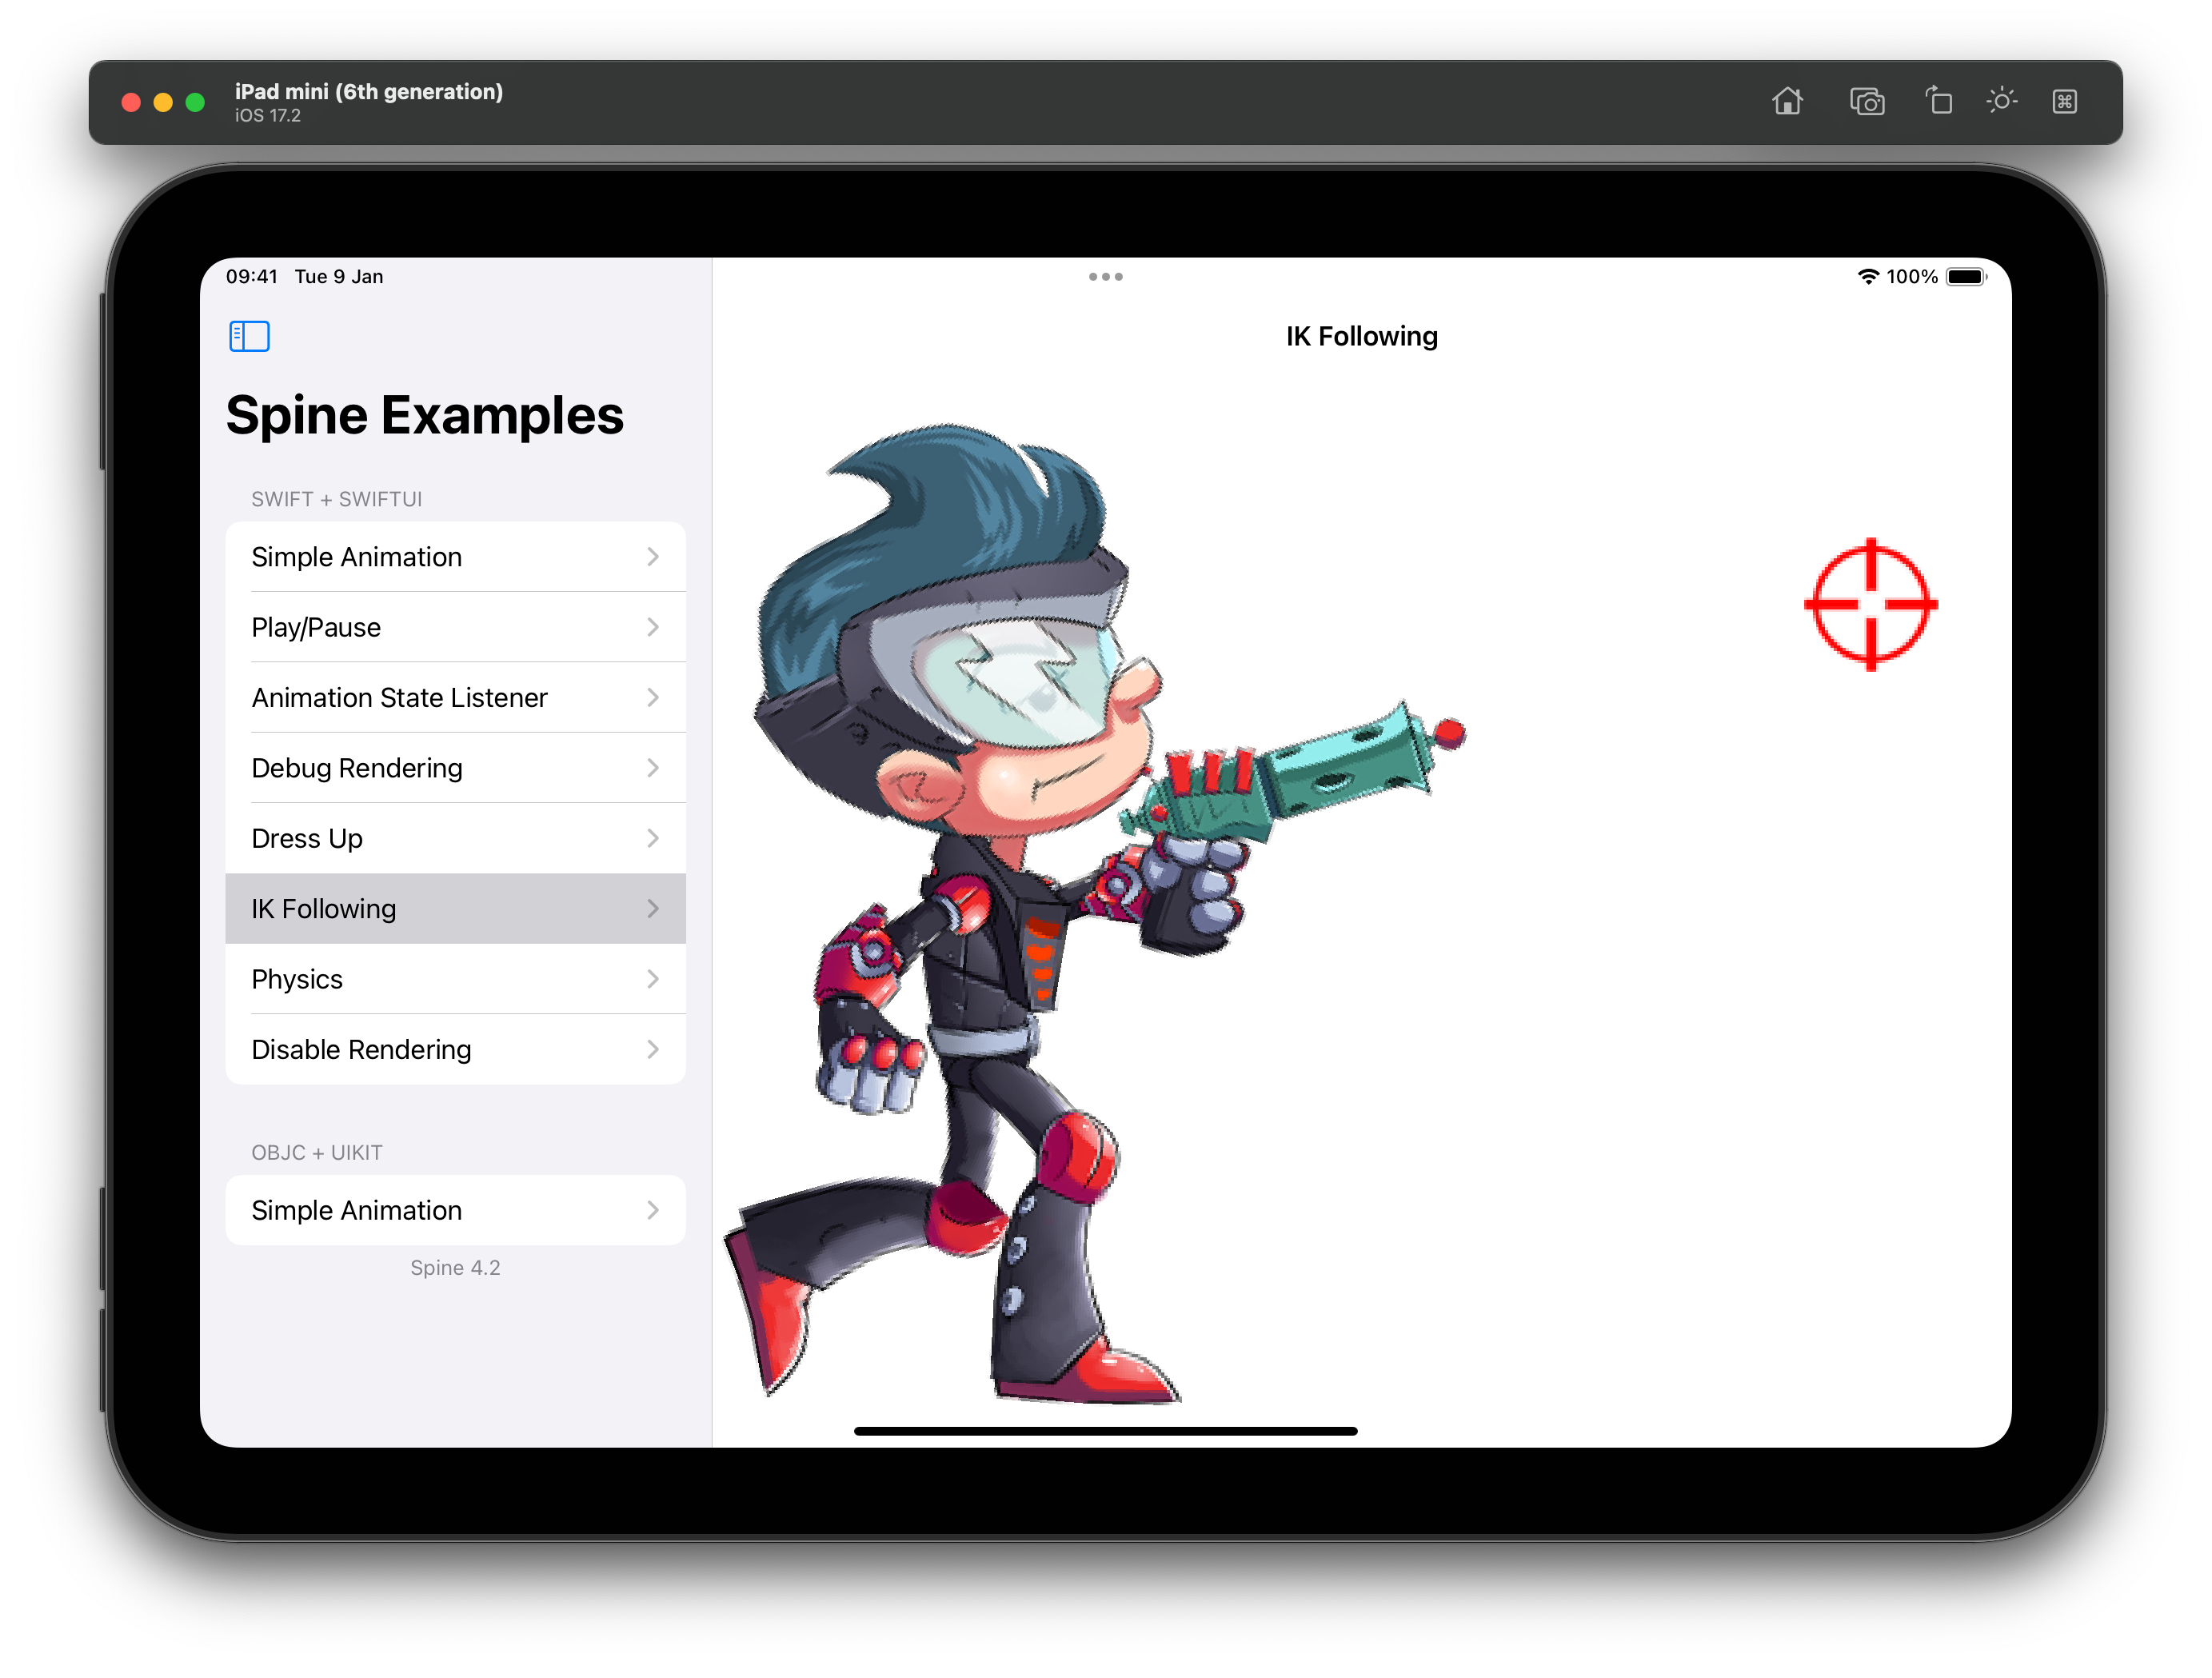
When authoring a skeleton in the Spine Editor, the skeleton is defined in what is called the skeleton coordinate system. This coordinate system may not align with the coordinate system of the SpineView the skeleton is rendered by. Touch coordinates relative to the SpineView need to be converted to the skeleton coordinate system, e.g. if a user should be able to move a bone by touch.
The SpineController offers the method toSkeletonCoordinates(position:) which takes a CGPoint relative to the SpineView it is associated with, and converts it to the skeleton's coordinate system.
See the IKFollowing.swift example.
You can also transform coordinates in the other direction using fromSkeletonCoordinates(position:). See the DebugRendering.swift example to learn more.
Spine Runtimes API access
spine-ios maps almost all of the Spine Runtime API to Swift. Objects returned by SpineController or SkeletonDrawableWrapper/SkeletonDrawable, like Skeleton or AnimationState are 1:1 translations of the spine-cpp API to Swift. You can thus apply almost all of the materials in the generic Spine Runtimes Guide to your Swift code.
Due to the nature of the spine-cpp bridge, there are however a few limitations:
- Any returned array or map is a copy of the internal array. Modifications will not have an effect.
- You can not create, add or remove bones, slots, and other Spine objects directly.
- The C++ class hierarchies of timelines are not exposed in Swift.
Objective-C and UIKit Support
spine-ios provides Objective-C compatibility through proper bridging. The example below is for UIKit on iOS; SwiftUI examples are shared by iOS and macOS:
Using spine-ios from Objective-C
-
Import the SpineiOS module in your Objective-C file:
objc@import SpineiOS; -
Use the Objective-C class names (prefixed with "Spine"):
objcSpineUIView *spineView = [[SpineUIView alloc] initWithAtlasFileName:@"spineboy.atlas"
skeletonFileName:@"spineboy-pro.skel"
bundle:[NSBundle mainBundle]
controller:nil
mode:SpineContentModeFit
alignment:SpineAlignmentCenter
boundsProvider:[[SpineSetupPoseBounds alloc] init]
backgroundColor:[UIColor clearColor]]; -
Key classes available in Objective-C:
SpineUIView- UIKit view for renderingSpineSkeletonDrawableWrapper- Drawable wrapperSpineBoundsProvider,SpineSetupPoseBounds,SpineRawBounds- Bounds providers
See SimpleAnimationViewController.m for a complete example.
Development
For developers who want to modify or build spine-ios from source:
Building the Modules
# Build SpineC (C API)
swift build --product SpineC
# Build SpineSwift (Swift API)
swift build --product SpineSwift
# Build SpineiOS (requires an Apple platform SDK)
# Use Xcode for SpineiOS as it requires platform-specific SDKs
Running Tests
swift build
swift run SpineTest
Generating Swift Bindings
If you need to regenerate the Swift bindings after modifying spine-c:
./generate-bindings.sh
This will regenerate the Swift wrapper code in Sources/SpineSwift/Generated/.